Estimated Reading Time: 9 minutes
TL;DR: Guarding nip points on conveyors means putting a physical barrier between a worker and any spot where two moving parts (or a moving part and a stationary one) could pull a hand, sleeve, or hair into the equipment. OSHA 1910.212(a)(1) requires it, and ANSI B20.1 sets the safe reach distances and gap sizes that determine whether your guard is actually compliant. The right guard is the one a worker can’t reach around, over, under, or through.
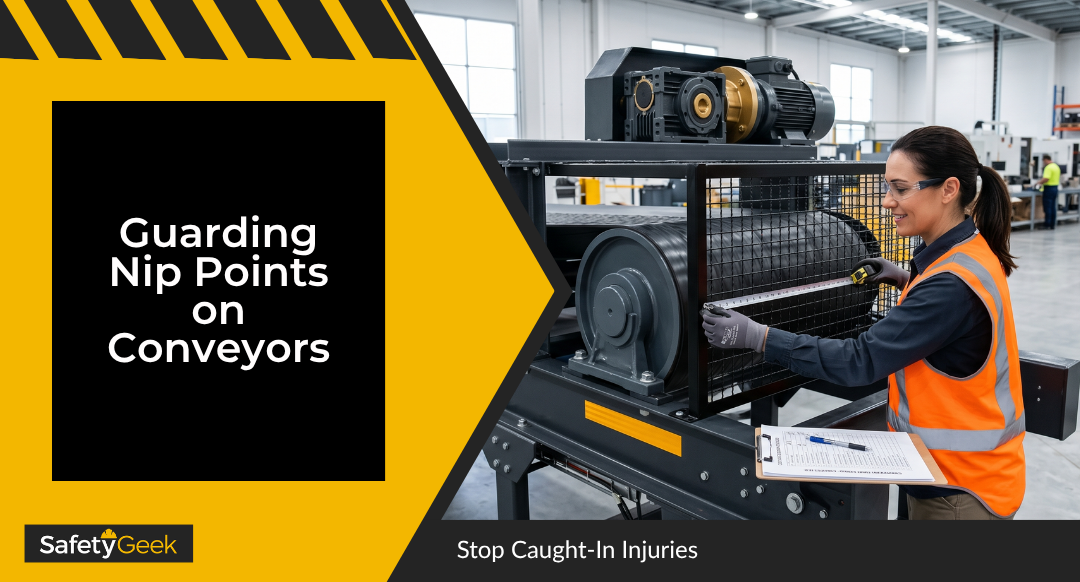
Conveyor nip points are the pinch zones where two moving parts come together… most often where a belt wraps around a roller, where a chain meets a sprocket, or where two rollers run side by side. Guarding nip points on conveyors is non-negotiable under OSHA 1910.212, because these are the exact spots that cause the caught-in and amputation injuries that show up in inspection reports year after year.
If you’ve ever stood in front of a head pulley, looked at the gap, and thought “that’s not really guarded, is it?”… you already know what brought you here. Most facilities have at least one conveyor where the guard “kind of” covers the nip point but a worker could still get a finger, a glove tip, or a rag in there during cleanup. That’s the gap we’re closing today.
Key Takeaways
- OSHA 1910.212(a)(1) requires guarding for ingoing nip points, rotating parts, and points of operation on every machine, conveyors included.
- A nip point exists wherever two moving parts (or a moving part and a fixed one) form a pinch zone… head pulleys, tail pulleys, snub rollers, return rollers, belt-to-belt transfers, and chain-and-sprocket drives.
- ANSI B20.1 is the conveyor safety standard OSHA inspectors use as the benchmark for “what good looks like,” even though they cite under 1910.212.
- Safe reach distances and maximum gap sizes from OSHA’s mechanical power-transmission standard (1910.219) tell you how big the openings in a guard can be at any given distance from the hazard.
- The most common failure isn’t a missing guard… it’s a guard that lets workers reach around or through it during cleaning, jam clearing, or maintenance.
- Lockout-tagout and machine guarding are inseparable. If a guard has to come off for service, the energy has to come out of the system first.
What Counts as a Nip Point on a Conveyor
A nip point on a conveyor is any location where two moving surfaces come together with enough force and proximity to catch, pull, or crush a body part. The textbook definition from OSHA’s machine guarding eTool is wider than most people realize… it includes both “in-running” nip points (where parts converge) and “shear” points (where moving parts cross fixed ones).
On a typical belt conveyor, you have nip points at every transition. The head pulley pulls the belt around its drum. The tail pulley does the same on the other end. Snub rollers press the belt into the drive pulley to increase friction. Return rollers carry the empty belt back underneath the frame.
Every one of those locations is a nip point. So is the spot where the belt meets a side guide, the gap between a belt and a fixed skirt board, the chain wrapping around a sprocket on a drive system, and the transfer point where one belt feeds product onto another. Roller conveyors create their own version… two adjacent powered rollers spinning toward each other will pull anything that lands in the gap between them.
| Conveyor Component | Type of Nip Point | Hazard |
|---|---|---|
| Head pulley / drive pulley | In-running (belt + drum) | Pulls hands, gloves, rags into wrap point |
| Tail pulley / return pulley | In-running (belt + drum) | Hidden under hopper or skirt; cleanup hazard |
| Snub roller | In-running (belt + roller) | Pinches anything between belt and roller |
| Return idler | In-running underneath | Often unguarded because “out of reach” |
| Chain and sprocket | In-running (chain + tooth) | Severe finger and hand injuries |
| Adjacent powered rollers | In-running (roller + roller) | Pulls product and people into gap |
What OSHA Actually Requires Under 1910.212 and 1910.219
OSHA’s general machine guarding rule, 29 CFR 1910.212(a)(1), says one or more methods of machine guarding shall be provided to protect operators and other employees from hazards including ingoing nip points, rotating parts, and flying chips and sparks. It doesn’t matter if the conveyor was built in 1985 or last week. If the hazard exists, the guard has to exist.
For conveyors with mechanical power-transmission components (drives, chains, sprockets, gears), 1910.219 kicks in as well. That standard gets specific about gap sizes and reach distances for guards over belts, pulleys, and chain drives… and it’s the section inspectors lean on when they want to write a citation that sticks.
OSHA also leans heavily on ANSI B20.1, the consensus standard for conveyor safety. ANSI B20.1 isn’t OSHA-enforceable on its own, but inspectors use it as the benchmark for what a “reasonable” guard looks like on a conveyor. If your guarding doesn’t meet B20.1, expect an inspector to argue your guard isn’t sufficient under 1910.212.
Here’s what that means in practice. A bare 1910.212 citation just says “you didn’t guard the hazard.” A 1910.212 citation backed up by ANSI B20.1 says “you didn’t guard the hazard, and here’s the industry standard you didn’t meet.” The second one is much harder to defeat at an informal conference.
Safe Reach Distances and Maximum Gap Sizes
This is where most guards fail. The guard exists, but the openings are too big or the guard is too close to the hazard. A worker can poke a finger, slide a hand, or push a glove through the opening and still reach the nip point.
The principle is simple. The smaller the opening, the closer it can be to the hazard. The bigger the opening, the farther away it has to be. Standard reach-distance tables from OSHA’s machine guarding eTool and ANSI B11.19 give you the math.
| Maximum Opening in Guard | Minimum Distance from Nip Point | What Fits Through |
|---|---|---|
| 1/4 inch (6 mm) | 1/2 inch (13 mm) | Fingertip |
| 3/8 inch (10 mm) | 2 1/2 inches (64 mm) | Finger |
| 1/2 inch (13 mm) | 3 1/2 inches (89 mm) | Finger past first knuckle |
| 3/4 inch (19 mm) | 5 1/2 inches (140 mm) | Finger to base |
| 1 1/2 inches (38 mm) | 6 1/2 inches (165 mm) | Hand |
| 2 1/8 inches (54 mm) | 15 inches (380 mm) | Arm to elbow |
Use these numbers when you design or audit a guard. Measure the largest opening in the guard. Then measure how far that opening sits from the closest nip point. If the distance is shorter than the table says, the guard is non-compliant… full stop.
One pattern I see constantly during audits: a guard cage with 2-inch mesh sitting 4 inches off a tail pulley. The mesh looks tight. The math says a hand can reach right through it and touch the nip point. That’s a citation waiting to happen, and worse, it’s an injury waiting to happen.
Types of Guards That Work for Conveyor Nip Points
Not every guard fits every nip point. The type of guard you choose depends on whether workers need access during normal operation, how often the area gets cleaned, and what kind of energy you’re isolating.
Fixed barrier guards are the gold standard. They bolt in place with tools-required fasteners, and a worker can’t move them without a wrench. Use them on head pulleys, tail pulleys, drive chains, and any nip point that doesn’t need routine access. They’re cheap, they’re effective, and they don’t fail because someone forgot to put them back.
Interlocked guards shut the conveyor down the moment they’re opened. These belong on access points that get opened during normal operation… inspection doors, sample-pull windows, certain transfer covers. The tradeoff is cost and maintenance. Interlocks need testing, and a defeated interlock is worse than no guard at all because everyone assumes the system is safe.
Distance guards (sometimes called perimeter guards) keep workers far enough away from the hazard that they can’t reach it. Catwalks with proper railings, fenced enclosures around the drive end, and elevated platforms all qualify. Use these when the hazard area is too big to enclose with a fixed guard.
Awareness barriers, like chains and yellow paint, are not guards. They’re reminders. OSHA does not accept them as the primary means of protection at a nip point, and neither should you.
For the deep dive on choosing between interlocked and fixed guards (cost, maintenance, when each one wins), machine guarding best practices walks through the decision framework.
THE ALL-ACCESS PASS RESOURCE PAGE
Get all the FREE templates, safety management resources, PDFs, spreadsheets, and more...
Where Conveyor Guards Fail in Real Facilities
The biggest mistake I see safety managers make isn’t missing a guard entirely. It’s installing a guard that looks compliant on a walkthrough and falls apart the second you watch how the conveyor actually gets cleaned, jammed, or serviced.
Cleanup is where most failures happen. A return idler is “guarded” by being 18 inches off the floor under a frame… until a worker grabs a long-handled scraper to clean fugitive material from underneath, leans in, and the scraper catches in the rotating idler. That guard relied on distance, and distance disappeared the moment a tool came into the picture.
Jam clearing is a close second. Workers reach into transfer points to free a stuck box. They open an interlocked door, defeat the interlock with tape or a magnet, and reach in while the belt is still running. They climb on the conveyor. They use bare hands where a tool was specified. None of this shows up on a routine inspection because none of it happens when an inspector is watching.
Maintenance creates the third failure mode. A mechanic removes a fixed guard for a belt change, reinstalls three of the four bolts, and walks away. The guard is “back on” but it can be pulled aside with one hand. That’s the same as no guard at all.
The fix is to audit guards in operating context, not just sitting still. Watch a cleanup. Watch a jam-clear. Watch a maintenance task end-to-end, including reassembly. The patterns you’ll see are the same ones that show up in machine guarding common violations… and they’re almost always solvable.
Building a Compliant Conveyor Guarding Program
A guard on a single conveyor is a fix. A guarding program is what keeps every conveyor in your facility compliant five years from now. The Safety Management Cycle gives you the structure for it… Identify, Develop, Implement & Train, Coach & Observe, Analyze.
Identify means walking every conveyor in the facility and listing every nip point. Use a risk assessment template, photograph each nip point, and rank them by exposure frequency and severity. The machine guarding risk assessment tool gives you the format.
Develop the guarding spec for each nip point. Document the type of guard, the maximum gap size, the minimum reach distance, the fastener type, and who’s responsible for installation. This is what protects you in an OSHA inspection… a written spec means the guard isn’t an afterthought.
Implement and train means installing the guards and training operators, cleaners, and maintenance staff on what each guard is for, how to recognize a defeated guard, and the lockout-tagout sequence required before any guard comes off. The OSHA machine guarding compliance checklist gives you a starting point.
Coach and observe by walking the floor during real work, not during routine inspections. The patterns I described above only show up when work is happening. Look for defeated guards, missing fasteners, and workarounds that have become “the way we do it.”
Analyze by tracking guard-related findings, near-misses, and incidents over time. If the same conveyor keeps generating findings, the guard design is wrong… not the people. Fix the design.
Frequently Asked Questions About Conveyor Nip Point Guarding
Does OSHA 1910.212 apply to conveyors?
Yes. 1910.212 is the general machine guarding standard, and OSHA applies it to conveyors anytime there’s an exposed nip point, rotating part, or other machine hazard that workers can reach. Mechanical power-transmission components on conveyors (drives, chains, sprockets) also fall under 1910.219, which gets more specific about guard construction.
What’s the maximum gap size allowed in a conveyor guard?
The maximum gap depends on how far the guard sits from the nip point. A 1/4-inch gap can be as close as 1/2 inch from the hazard. A 1 1/2-inch gap needs at least 6 1/2 inches of clearance. Always measure both the largest opening and the distance to the nearest hazard, then check both against the OSHA reach-distance tables before you call the guard compliant.
Are return idlers required to be guarded?
Yes, if workers can reach them during normal operation, cleaning, or maintenance. The phrase “out of reach” only protects you if it’s actually true in every working condition… including when workers use long-handled tools to clean fugitive material. If a scraper, broom, or shovel can contact the idler, it needs a guard.
Can yellow paint and warning signs replace a physical guard?
No. OSHA treats paint, chains, and signs as awareness barriers, not guards. They might supplement a guard, but they don’t replace one at a nip point. The hierarchy of controls puts engineering controls (physical guards) above administrative controls (signs, training) for exactly this reason.
What about guards that have to come off for cleaning or jam clearing?
Use an interlocked guard or require lockout-tagout before removal. If the guard is fixed and a worker has to remove it for routine cleanup, the energy in the conveyor has to be locked out first. Defeating an interlock with tape, a magnet, or a wedged tool is one of the fastest paths to a serious injury and an OSHA willful citation.
How often should I audit conveyor guards?
Audit every conveyor guard at least quarterly, plus after any maintenance event that involved removing the guard. The quarterly walkthrough catches drift… missing fasteners, bent mesh, defeated interlocks. The post-maintenance check catches the most common failure mode of all, which is a guard that didn’t go back on correctly.
Now It’s Your Turn
Conveyor nip points are some of the most-cited and most-injurious hazards in general industry, and they’re also some of the most fixable. The math on reach distances and gap sizes isn’t subjective. Either the guard meets it or it doesn’t.
Here’s where to start this week:
- Walk one conveyor in your facility and list every nip point on it (head pulley, tail pulley, snubs, returns, drives, transfers).
- For each one, measure the largest gap in the existing guard and the distance from that gap to the nip point. Compare to the OSHA reach-distance table above.
- Watch a cleanup or jam-clear on that conveyor. Note every time a worker reaches around, over, under, or through a guard.
- Pick the one nip point with the highest exposure and highest severity, and fix it first. Don’t try to overhaul every conveyor at once.
- Document the fix with a written spec so it doesn’t drift back over time.
If you’re staring at a plant full of conveyors and not sure how to build the business case to fix them all, that’s exactly the work we do inside the Safety Leadership Academy… turning a list of “things I should fix” into a funded, scheduled, leadership-backed program. You don’t have to figure this out alone.
You got this, Safety Friend.
Hi, I'm Brye (rhymes with sky)! I am a self-proclaimed safety geek with two decades of general industry safety experience. Specializing in bringing safety programs to a world-class level and building a safety culture, I have trained and coached many safety managers, just like you, on how to effectively manage workplace safety in the real world. I would love to help you too.